In this Article
- A Lakeside Launch Starts with a Leash Decision
- What the Cuff, Cord, Swivels, and Rail Saver Do
- Coiled, Straight, and Hybrid Cords Solve Different Problems
- On Lakes, Keep the Cord Clear and Read the Shoreline
- In Surf, Use a Wave-Suitable Leash and Allow for Recoil
- On Rivers, Entanglement Changes the Leash Decision
- Inspect Every Connection Before Trusting the Leash
- Make the Leash Check Part of Every Launch
A Lakeside Launch Starts with a Leash Decision
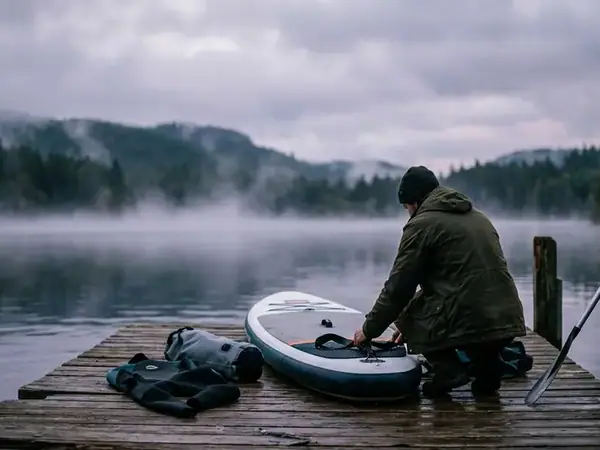
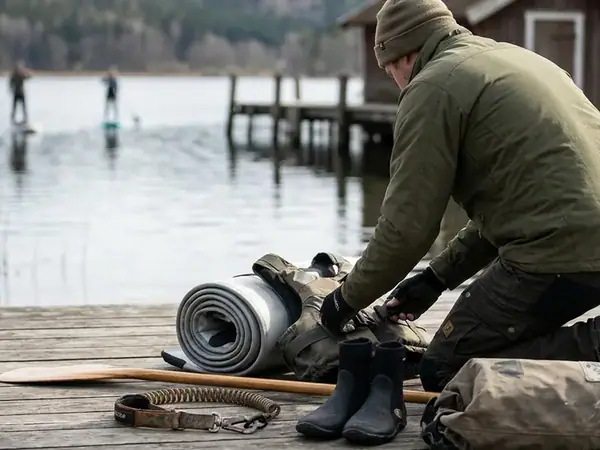
Consider a common pre-launch scenario: at a sheltered lake access point, a paddler sets a coiled leash on the tail of an inflated paddleboard, studies the wind lines forming beyond the cove, and scans the shoreline for a spillway outlet, boat moorings, and submerged timber. Choosing the right tether for this session starts with reading the water and its specific hazards. Cord shape and deck aesthetics come second.
A stand-up paddleboard leash connects a swimmer to their primary flotation platform when wind or waves would otherwise separate them, yet that same tether introduces severe risk if the water moves past fixed obstacles. Before attaching any hardware to a board or body, a paddler must distinguish between three fundamentally different environments: unobstructed flatwater, breaking surf, and flowing water. Each environment dictates both the behavior required from the cord and where the release mechanism must sit on the paddler's body.
Treating the leash and its attachments as an integrated safety system prevents the common mistake of carrying a single recreational coil into every aquatic venue. The analysis begins by breaking down the individual links between the hull and the paddler.
What the Cuff, Cord, Swivels, and Rail Saver Do
Tracing the connection from the board toward the paddler reveals how force and movement transfer across the gear. Rather than operating as a single monolithic strap, a leash assembly consists of four distinct zones: the board's designated attachment point, the attachment loop and rail saver, the urethane cord with its end swivels, and the paddler-side cuff or compatible waist-release system. Evaluating these parts in sequence exposes where compatibility issues or release failures can develop.
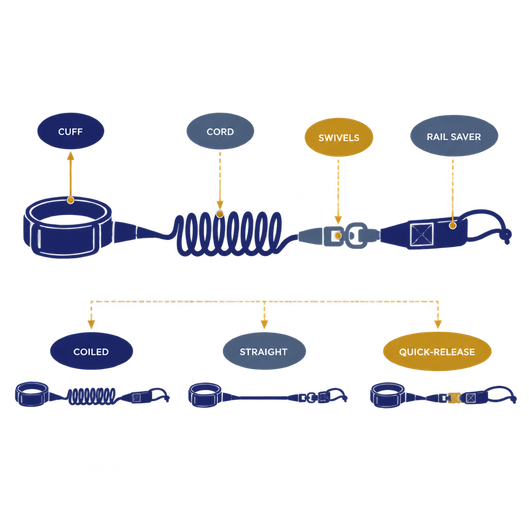
At the tail of the board, the tether must anchor to a fitting specifically engineered and approved by the board manufacturer for leash loads. Cargo bungees, soft carry handles, and aftermarket fishing accessory mounts lack the structural reinforcement required to hold a loaded board in wind or waves unless the manufacturer explicitly designates them as leash points. From that approved ring, a thin attachment loop threads through to connect the rail saver—a wide band of webbing designed to distribute pressure where the strap wraps over the edge of the hull. While the rail saver protects the board's drop-stitch fabric or composite rail from slicing under tension, and small metal swivels at either end of the cord allow relative rotation to reduce twisting around the feet, neither component prevents a cord from catching on an underwater obstruction.
At the paddler end, the attachment location determines whether a person can actually reach and operate the release under duress. Standard ankle and calf cuffs place the hook-and-loop pull tab on the lower leg, which functions well when a swimmer is floating freely in calm water. In contrast, a purpose-designed quick-release waist system relocates the connection and its release toggle to the torso. This distinction is critical: the choice between a coiled or straight cord never answers where or how the paddler can release from the board. Furthermore, clipping an ankle leash onto an ordinary wading belt or adding an unrated carabiner does not establish that the resulting assembly will release appropriately when pinned under load. Paddlers should always consult both the board and leash manufacturers' fitting instructions for exact loop routing, rail-saver placement, component compatibility, and closure verification, as attachment hardware varies across inflatable paddleboards.
Coiled, Straight, and Hybrid Cords Solve Different Problems
Where does the excess length of a leash sit while you paddle, what underwater features might it contact, and how does the material react when stretched under sudden load? Answering these questions requires separating the physical geometry of the cord from the release mechanism attached to the rider. A tidy coil resting on a flatwater deck is a convenience for footwork and glide, not an entanglement-control system.
| Cord shape | Usual application | Practical benefit | Principal limitation |
|---|---|---|---|
| Coiled | Sheltered, unobstructed flatwater | Generally keeps more cord close to the deck instead of trailing | Can still snag and can recoil when tension is released |
| Straight | SUP surfing with a wave-suitable product | Accommodates board–paddler separation in waves | Trailing cord can catch debris or obstacles; stretch can pull the board back |
| Hybrid | Product-specific recreational or specialist use | Combines straight and coiled sections | Handling and suitability depend on the actual design |
A coiled cord stays compact only while unloaded. Once a falling paddler or a gust of wind pulls against the hull, the coil extends toward its full length, meaning its compact resting shape offers zero guarantee that it cannot reach a nearby piling or submerged branch. When that tension suddenly drops, the wound urethane can also spring back rapidly toward the paddler or the deck.
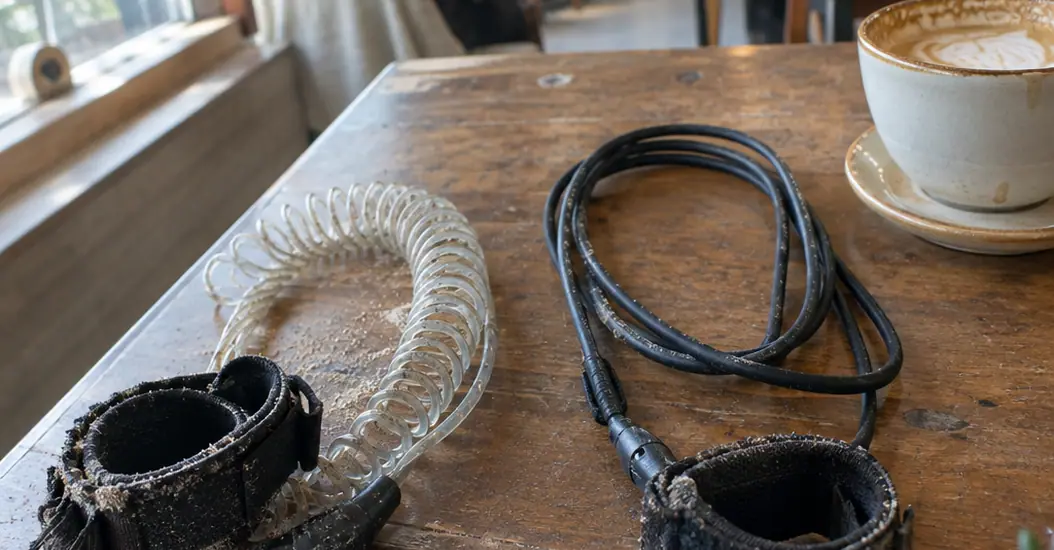
Straight cords designed for the surf zone eliminate the tightly wound spring geometry to allow cleaner separation between the rider and the board during a wipeout, though the urethane itself still stretches under wave loads and can pull the board back toward the swimmer. Because a straight cord drags in the water behind the tail, it picks up floating weeds and passes directly over shallow reef or bottom debris. Hybrid designs attempt to split the difference with a short coiled section and a straight run, requiring careful evaluation of the specific product's behavior. Crucially, "quick-release" describes a release mechanism at the body rather than a fourth cord shape; pairing a coiled cord with an ankle cuff does nothing to make a river setup safe.
On Lakes, Keep the Cord Clear and Read the Shoreline
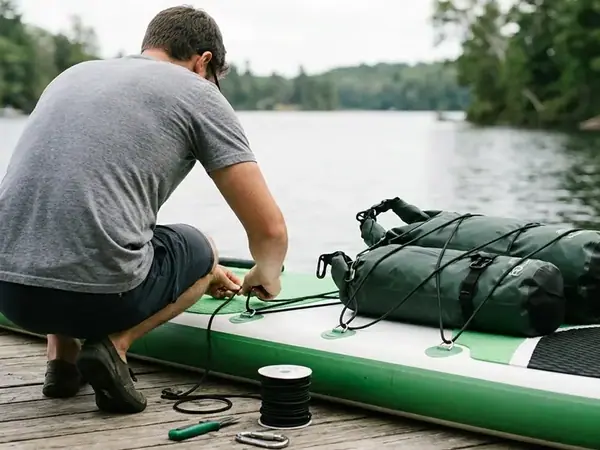
Returning to the lakeside launch scenario illustrates how rigging and route planning intersect on flatwater. Suppose a paddler prepares an inflatable board for an afternoon of casting in a quiet bay, fitting a coiled leash to an ankle or calf cuff so the cord stays out of the water and avoids dragging through weed beds. With the board still resting ashore, the paddler traces the path of the coil across the rear deck, checking where it lies relative to dry bags, crate tie-downs, rod holders, and the standing zone. Before stepping onto the water, loose monofilament line and exposed treble hooks are cleared completely away from the rear deck, and the cord routing near the rails and fin box is verified without pulling the leash tight against sharp hardware.
Even on a calm lake, tidy deck rigging does not eliminate entanglement hazards, nor does the word "lake" on a map guarantee benign water. If the planned route leaves the sheltered cove and approaches a dam spillway, a narrow bridge channel, a dense mooring field, or a tidal narrows, the hydrodynamic risk shifts immediately. The lake-to-river boundary is defined by moving water and obstructions rather than the shoreline label—an outlet or bridge piling can turn a deck-tidy coiled leash into a dangerous tether exposed to current and snags, requiring a fresh entanglement assessment before proceeding.
Rigging and Route Boundaries
A coiled leash keeps cord off the water on unobstructed lakes, but paddlers must keep it clear of fishing tackle and reassess the entire connection system whenever a route approaches outlets, moorings, or bridges.
Open-water exposure demands equal respect. Once a paddler moves beyond the lee of the trees, offshore gusts can push an unattached inflatable board away faster than a person can swim. Wearing an appropriate leash keeps the board within reach, provided it is paired with a properly fitted personal flotation device and conservative judgment regarding wind forecasts and weather shifts.
In Surf, Use a Wave-Suitable Leash and Allow for Recoil
Breaking waves subject a tether to abrupt shock loads and turbulent whitewater, making a straight leash specifically engineered for SUP surfing the standard starting point in the surf zone. Recreational flatwater coils tend to sit on the tail where they can trip a surfer stepping back onto the stomp pad, and their wound geometry can amplify board recoil when a heavy lip separates rider and craft.
Rather than relying on arbitrary rules of thumb regarding cord thickness, breaking strength, or board-length multipliers, surf paddlers should match the leash to their specific board volume, length, and wave conditions using the manufacturer's published guidelines. River-style waist belts are not a universal substitute for dedicated surf gear. At the water's edge, the paddler secures the surf leash cuff at the ankle or just below the knee on the calf, following the manufacturer's design specifications.
Equipment selection never replaces spatial awareness in the lineup. Under the force of a breaking wave, even a heavy-duty straight surf leash will stretch significantly and can slingshot the board back toward the surfer, or an attachment loop or swivel can fail entirely—practitioner accounts of surf zone incidents indicate as much. Maintaining wide separation from other surfers and swimmers remains essential, as the unloaded length of a cord on the beach never defines the true hazard radius of a loose board in the impact zone. This guide distinguishes leash systems; selecting one does not establish that a paddler has the swimming ability, surf skills, moving-water training, or suitable conditions needed for a particular session.
On Rivers, Entanglement Changes the Leash Decision
Flowing Water Entrapment Hazard
A tether caught on a branch, rock, bridge pier, or submerged structure can hold a paddler in flowing water, while the force of the current pushes the rider downstream and makes an ankle or calf release completely unreachable.
While a sheltered lake assessment centers on wind drift and keeping the board nearby, a river launch below a highway bridge forces an immediate entanglement evaluation before any tether is clipped on. Moving water exerts relentless pressure against anything held stationary against the flow. Even apparently gentle current can produce life-threatening consequences the moment a leash snags on a riverbed rock or mid-channel timber, holding the paddler in place and driving them underwater; consequently, there is no current-speed threshold below which a standard ankle or calf leash can be treated as safe.
For paddlers operating in moving water where a tether is still deemed beneficial, a purpose-designed, compatible quick-release waist system serves as a conditional option—provided the paddler has the training to use it, rather than blanket permission to wear a leash on every river. Placing the release buckle or toggle at the waist aims to keep the mechanism within the paddler's reach when folding at the hips or being washed downstream. However, actual release accessibility and mechanical performance under load depend heavily on the specific system's engineering, accurate torso fitting, cold-water clothing layers, personal flotation device geometry, and the exact angle of the snag. Seeing a bright release toggle while standing comfortably on the riverbank does not prove that a swimmer will be able to locate and pull it during a violent underwater entrapment.
Paddlers considering a river launch must evaluate bridge abutments, downstream strainers, eddy access, exit points, and local safety guidance before deciding whether to wear a compatible waist-release system or paddle entirely unleased. Above all, no leash configuration makes strainers, flooded trees, weirs, low-head dams, or similar hydrological hazards safe; strict route avoidance, qualified moving-water instruction, and a proper buoyancy aid remain non-negotiable. Paddlers should learn and rehearse the manufacturer's exact release procedure through controlled professional instruction, never by conducting self-directed current drills, tying a leash to a stationary object in flow, or running improvised loaded-release experiments.
Inspect Every Connection Before Trusting the Leash
Mechanical integrity across the entire tether assembly can only be verified through a systematic pre-launch routine. Inspecting the gear in a fixed order from the hull to the body ensures that small textile loops and molded joints receive the same scrutiny as the main urethane cord.
- Board attachment point: Examine the board's designated D-ring or leash plug and its surrounding mounting patch or fiberglass housing for lifting edges, cracking, excessive play, or delamination.
- Attachment loop and rail saver: Check the narrow attachment cord and the wide rail-saver webbing for fraying, cuts, UV degradation, broken stitching, or twisted routing that forces a thin cord against a sharp rail edge.
- Main cord length: Run your fingers along the entire urethane cord—stretching out coiled sections lightly by hand to inspect inside the turns, looking for nicks, surface cracks, deep abrasion, or sections that have permanently stretched and thinned.
- Molded transitions: Inspect the rigid sleeves where the cord joins the end fittings for splitting, urethane separation, or stress whitening.
- Swivels and hardware: Rotate the swivels and check all metal rings or pins for salt corrosion, bending, burrs, or binding that deviates from the manufacturer's normal movement.
- Cuff webbing and closure: Peel open the ankle or calf cuff to inspect the load-bearing stitching and the hook-and-loop fasteners. Clean out sand, grass, or lint only as directed by the manufacturer, and retire any cuff whose closure no longer grips securely across its full surface.
- Waist-release components: For compatible quick-release belts, inspect the buckle, pull toggle, and routing channel, then verify the fit and release action ashore following the manufacturer's specified check procedure.
Any cut in the urethane, frayed stitch on the rail saver, corroded swivel, slipping hook-and-loop tab, or waist mechanism that hesitates during a dry check constitutes a mandatory stop-use defect. Because visual inspection cannot establish the remaining breaking strength of a leash that has survived a severe load, suspect gear should be retired immediately rather than patched with electrical tape, shortened with knots, or spliced with hardware-store connectors.
Make the Leash Check Part of Every Launch
Building a disciplined launch sequence turns gear theory into habit: read the actual water conditions and downstream features first, select the appropriate connection system for that environment, inspect and fit every component from board to body, test any release mechanism ashore according to its instructions, and continuously reassess the route as you paddle. Keep the core functional distinctions front of mind—coils commonly suit unobstructed flatwater, straight surf leashes match their intended wave environments, and any moving water demands a dedicated entanglement assessment before deciding whether a compatible waist release or no leash at all is appropriate.
Back at the sheltered lake launch, the paddler finishes clearing a stray loop of fishing line from the rear cargo bungee and runs a thumb over the rail saver and ankle cuff closure to confirm everything sits flat and secure. Across the cove, a brisk gust darkens the water, so the paddler pauses with one foot on the shoreline gravel, watching the wind line pass before stepping onto the deck and pushing off into the calm bay.