The Deck Storage Rule of Thumb
Deck storage should keep your gear secure without changing how the board trims, turns, or lets you climb back on after a fall. That is the whole job. Everything else is detail.
I treat this as a handling problem first and a gear-carrying problem second. Before you reach for a single strap, decide what actually needs to ride on the board, place it, and only then ask whether the board still paddles the way it did empty.
The method I use runs in four steps: plan the load, use the attachment points the board already has, test the setup on dry land, then make one short calm-water paddle before adding any distance. On that first water test, stay close enough to shore that you can return immediately if the trim feels off, something snags, or your remount space has disappeared under a dry bag.
This guide covers recreational inflatable and hard-board SUP storage. It is not written for whitewater expedition rigging, surf-zone launches, towing systems, or manufacturer-certified load modification, and it should never override the instructions that came with your board.
Map the Trip Before You Add Tie-Downs
Make the storage decision before you touch any hardware. Lay the real trip kit out on the ground, remove anything you will not actually use that day, then sort what remains into reach-now items and stay-put items.
The usual deck candidates: a dry bag, water bottle, hand pump, sandals, a spare layer, tackle tray, a small cooler, an anchor kit, a phone case, a first-aid kit, and a safety whistle. Most paddlers carry more than the outing requires. Cutting that list is the cheapest stability upgrade available.
Keep your must-reach safety gear on top of the load path, never buried under a cargo net.
Trip type drives the rest. Flatwater exercise wants a nearly empty deck so nothing interrupts your stride and stance. SUP fishing wants tools within arm's reach. Travel paddling usually prioritizes compact dry storage and balance over quick access. As you arrange things, protect two zones: a standing zone running from the carry handle through your normal foot position, and a remount zone where your chest and hips can slide back onto the board without hitting a box or strap.
Use Built-In D-Rings and Handles Before Aftermarket Anchors
Start with the attachment points the board already gives you. Those locations are usually chosen to match the deck layout, the expected cargo zones, and where you stand, so they tend to work better than anything you bolt on later.
The order I follow is simple: factory D-rings first, then deck bungee mounts, then grab handles, then removable rail-mounted accessories, and only then adhesive or permanent hardware.
Factory points sit where the maker expected deck loads. That said, I avoid quoting a load rating unless the manufacturer published one. "This ring feels strong enough" is not a specification.
Inspect Before You Load
Run the same inspection sequence every time before the board goes in the water:
- Check the edges of PVC patches for lifting.
- Look for cracks in plastic mounts.
- Check metal rings for corrosion.
- On hard boards, look for loose screws.
- Find frayed shock cord and flattened knots.
- Watch for deck-pad separation around any anchor.
One restraint worth stating plainly: do not turn leash plugs, valve areas, fin boxes, or ordinary carry handles into high-tension cargo anchors unless the board maker specifically permits it.
When Aftermarket Lashing Points Make Sense
Choose aftermarket lashing only after you know where the cargo lives. A light dry bag that creeps forward may need nothing more than a low-tension keeper. A cooler, crate, or anchor system may demand a board actually designed to carry it.
Realistic add-ons fall into a short list:
- Adhesive PVC D-ring patches on compatible inflatable boards.
- Suction mounts for temporary, light accessories.
- Rail-mounted accessories on fishing-oriented boards.
- Screw-in fittings on hard boards built to accept them.
Surface preparation decides whether adhesive holds. You want a clean, dry, compatible bonding surface, the adhesive specified for your board material, firm pressure during the bond, and the full cure period stated by the adhesive or accessory maker before the board ever touches water. I am deliberately not giving you a cure time here, because that number belongs to the product, not to a general guide.
Risk: Keep adhesive anchors off seams, textured deck pads, high-flex rail areas, and valve surrounds. Avoid any spot where a rolled inflatable board will crease over the same point again and again. Placement in those zones can affect warranty coverage, resale value, and your safety on the water.
Build the Deck Pattern: Bungees, Straps, Nets, and Clips
Build the retention pattern around the direction of force. The system should pull cargo down and slightly inward toward the board, not drag it sideways across the deck or leave one anchor carrying the whole load.
Match the retention type to the cargo:
- Shock cord for light, flexible loads like a jacket or a soft dry bag.
- Flat straps for firmer compression on a crate or cooler.
- Cargo nets for soft, irregular items.
- Clips and carabiners as secondary retention, not the only restraint.
Cargo shape matters more than people expect. A bow bungee that holds a soft jacket securely may let a smooth hard cooler slide sideways, simply because the bungee compresses fabric well and grips plastic poorly.
For layout, a practical bow pattern is two crossing bungee runs over a small dry bag, with the buckle or release point left visible instead of buried under the bag. On touring boards, lower-priority gear can ride in the stern area, heavier compact loads belong near the centerline, and fishing tools want side access.
Tip: Use a strap with a contrasting color, a ribbed pull tab, or a different texture on the release side, so wet, cold hands can find the opening point quickly.
Pack by Weight, Access, and Wet-Dry Priority
Pack in three passes. Place dense compact items near the centerline first. Move safety and frequently used gear where it stays reachable. Then separate wet-tolerant storage from water-sensitive storage.
Dense items such as a water-filled bottle, a compact anchor kit, a small cooler, or a tackle box should stay low and close to the centerline rather than stacked tall near the nose. Tall unstable stacks at the bow are how a calm paddle turns into a swim.
Trim tells you when placement is wrong. If the nose pushes water, wanders, or feels reluctant to turn, shift weight aft or inward. If the tail sits low and the board drags, move compact cargo forward.
A setup that feels rock-solid on a wide fishing board can leave a narrow touring board nose-heavy and harder to turn, so re-check trim whenever you change boards.
For the water itself: dry bags for clothing and electronics, ventilated containers for wet footwear, and secure boxes for fishing tackle. Keep those categories from mixing.
Shore check: Load the board exactly as you'll paddle it, lift the nose and tail one at a time at the shore, then rock the board side to side and watch which item moves first. That item is your weak point.
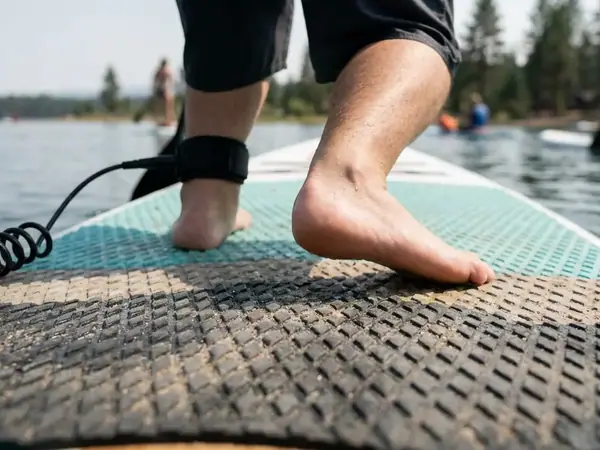
Keep the Board Paddlable, Swimmable, and Recoverable
Judge the setup by recovery tasks, not by how tidy it looks on the beach. You should be able to kneel, prone paddle, rotate the board, fall clear of hard objects, and climb back on without fighting your own cargo.
Keep these unobstructed at all times:
- The leash attachment.
- The inflation valve.
- The main carry handle and side handles.
- Deck grip around your stance area.
- Personal flotation gear.
Then hunt down snag points and shorten or remove them: loose cord loops, dangling carabiners, open clip gates, rod leashes crossing the standing zone, anchor line near your feet, and cargo-net corners that can catch a finger or a paddle shaft. A clip you added as backup becomes a hazard the moment it swings near your line path or stance.
Storage is a safety system, not a convenience. Follow your local rules and official safety guidance as the final word; the U.S. Coast Guard paddle-sports safety guidance is a sensible starting reference.
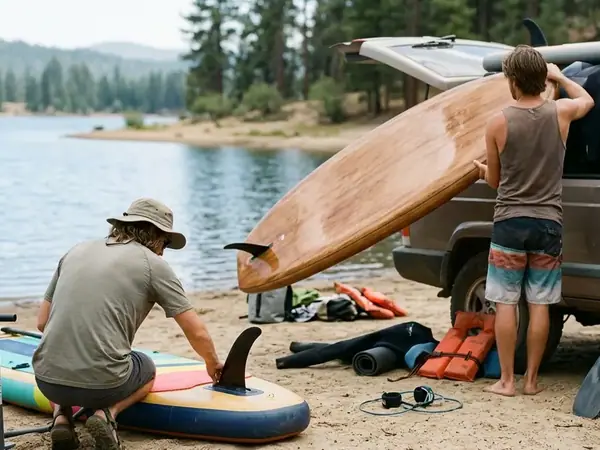
Fishing and Travel Setups Need Different Storage Logic
Fishing and travel solve different problems. Fishing storage needs repeated access without line snags. Travel storage needs compact, removable, dry organization that comes off the board fast for transport.
The Fishing Layout
Picture a paddler with one rod, pliers, a small tackle tray, and a soft cooler. Keep the pliers on your working side, the tackle in a closed box, and every loose bungee end away from the line path. The goal is to reach a tool without looking down and without finding your line wrapped around a cleat.
The Travel Layout
Now picture walking from a rental car to a lake launch. One dry bag and one bottle holder beat several clipped accessories that you have to strip off again for loading or airline packing. Fewer pieces, faster setup, less to lose.
A cooler, crate, or tackle bag only works if the board has the width, stability, and clear deck area for your skill level. Any of those containers also changes your fall zone, so place it where you can still kneel forward of it or remount beside it without landing ribs-first on a hard edge.
The Pre-Launch Shake Test and Final Checklist
Make the shake test your final decision gate. If the loaded board cannot pass a controlled shore test, do not assume it will behave better once waves, wet hands, and fatigue arrive.
Run this sequence at the water's edge: load the board, tighten the system, tilt it to both rails, press down and forward on each cargo item, pull the board as if grabbing it after a fall, then step into your normal stance and kneeling positions. Finish with a closure check across every fastener you used, including dry-bag roll-top, strap buckle, bungee knot, clip gate, crate lid, tackle latch, cooler handle, rod-holder lock, and anchor-line keeper.
After the paddle, inspect again. Look for lifted adhesive edges, new strap fuzz, shiny scuffing on the deck pad, stretched bungee, and any hardware that rotated under load. Those are early warnings, and they're easier to fix on shore than mid-trip.
Final Deck Storage Checklist
- Standing zone is clear.
- Remount path is clear.
- Factory anchors and bungees have been inspected.
- Heavy compact gear is low and near the centerline.
- Safety items are reachable without unloading cargo.
- No loose cord loops, no blocked valve, no blocked leash point.
- A calm-water test happened before any distance paddling.
Close on the simplest safe standard: carry only the gear the trip requires, secure it without blocking movement, and let board-specific instructions override any general rigging idea. Any exact claim about load limits, adhesive compatibility, warranty coverage, or permanent hardware has to come from your board or accessory maker, not from a guide like this one.