Inflatable paddleboard care is rarely about keeping the board looking new. The goal is functional preservation. Proper maintenance protects seams, valves, deck pads, fin boxes, and PVC fabric from avoidable wear. This routine covers six basic stages: rinse, wash, dry, inspect, repair, and store. This guide is written for recreational iSUP owners and prioritizes manufacturer instructions where specific product designs differ.
In this Article
- Set Up a Board Care Kit and a Safe Cleaning Area
- Rinse the Board After Every Paddle
- Wash Away Salt, Mud, Fish Residue, and Deck Pad Grime
- Dry the Board Completely Before It Goes in the Bag
- Inspect Valves, Seams, Rails, Fins, and Attachment Points
- Store It Inflated, Loosely Rolled, or Packed for the Season
- Travel and Invasive Species Care
- Minor Repairs and When to Stop
- Maintenance Calendar
- Scope Limitations
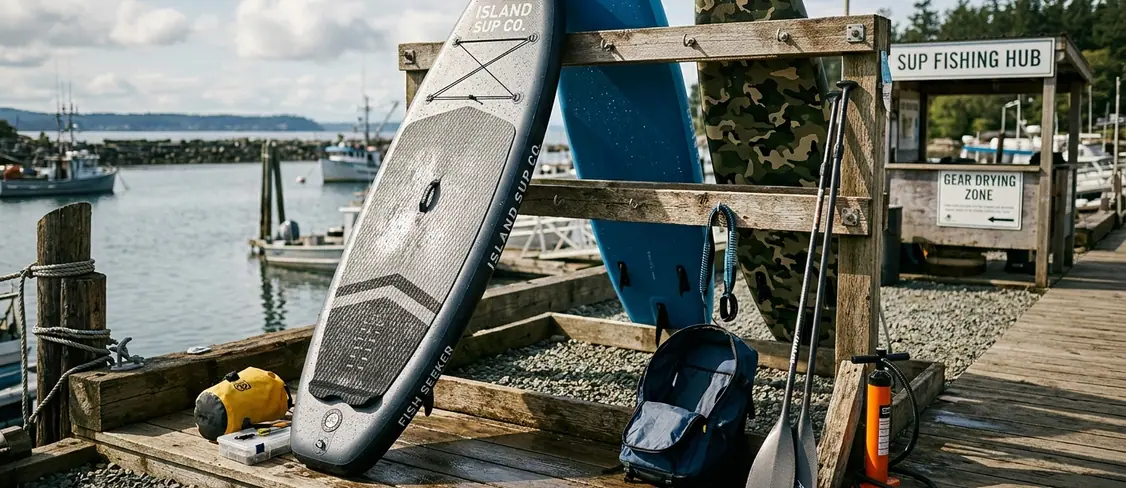
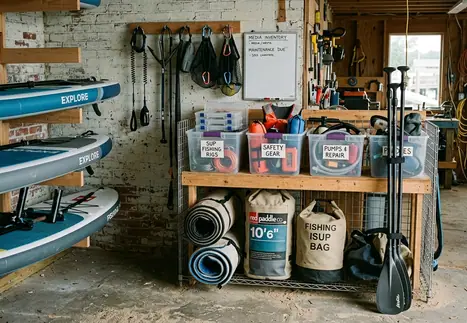
Set Up a Board Care Kit and a Safe Cleaning Area
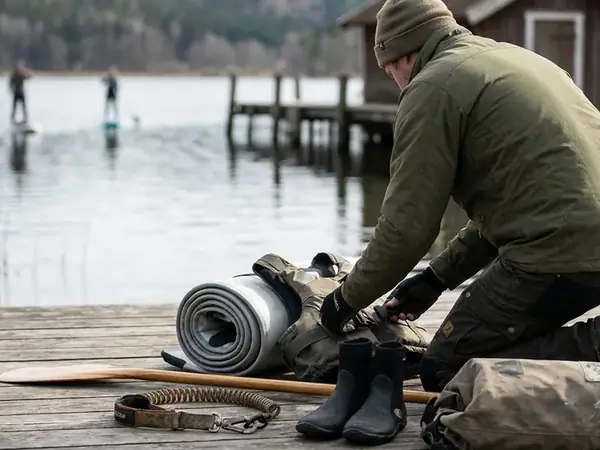
A travel kit packed in a sealable pouch ensures you have the right tools at the launch site. This compact version requires only one small sponge, one microfiber towel, a palm-size soft brush, a few repair patches, a valve tool, and a spare fin screw. For home maintenance, build a core kit that includes a fresh water hose or rinse jug, a soft sponge, a microfiber towel, mild biodegradable soap, a soft-bristle brush, a valve wrench, repair patches, manufacturer-supplied PVC adhesive, and a dry storage bag.
The point is to choose supplies that clean without abrading PVC, EVA foam, adhesive bonds, or printed coatings. Harsh solvents, pressure washers, abrasive pads, petroleum-based cleaners, and direct high-heat drying degrade board materials rapidly.
That affects where you should perform your maintenance. Suitable work areas include a shaded driveway, a garage floor covered with a clean tarp, a campsite rinse station, a dockside staging area, or a gravel pullout. Select a location where soap runoff will not drain directly into the water.
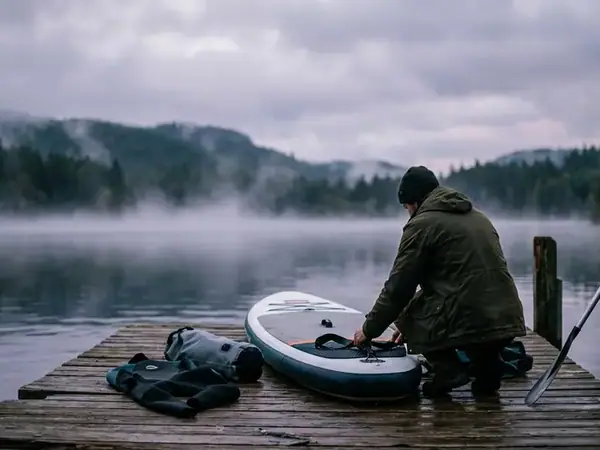
Rinse the Board After Every Paddle
Why make rinsing a non-negotiable habit after every outing? It catches problems before they become intensive cleaning jobs. Rinsing removes abrasive particles immediately, especially after navigating saltwater bays, brackish water, sandy beaches, muddy riverbanks, or algae-heavy launches.
The sequence follows the parts most likely to trap grit. Start with the textured deck pad, then move to the rails, hull, fin box, leash plug, D-rings, handles, and valve area. Do not aim a hard stream of water directly into the inflation valve. Rinse gently around the cap and collar instead. After saltwater or brackish water exposure, pay specific attention to the fin box, fin screw channel, leash plug, metal D-rings, and bungee anchors before wiping the flat PVC panels.
In practice, a basic freshwater rinse usually takes 3-7 minutes for a single recreational iSUP when the board is already out of the water and gear is removed. A lightly inflated board is easier to inspect because rail seams and deck-pad edges are visible; a fully deflated board can hide creases, sand, and small seam lifts.
Critical Insight: Keep the board lightly inflated during the rinse stage. This exposes the seams and rails while reducing folds that trap sand or mud.
Wash Away Salt, Mud, Fish Residue, and Deck Pad Grime
Use soap only when water alone leaves a film, odor, or visible residue. Mild biodegradable soap is appropriate for stubborn mud, salt film, fish slime, sunscreen residue, and food spills from touring or fishing days. Break the washing process into surface-specific steps to protect different materials.
For the PVC skin, wipe with a wet sponge and mild soap, then rinse until the surface no longer feels slippery. The EVA deck pad requires a soft-bristle brush used in small circular passes rather than scraping aggressively in one direction against the foam texture. Check the rails and underside carefully. Focus on roughly the first 12-18 inches from the nose and tail because these areas frequently contact docks, gravel, roof racks, and shoreline debris.
Remove the fin before washing the fin box and accessory mounts so sand is not driven deeper into the track or screw slot. A fishing iSUP needs more detailed cleaning around rod holders, cooler tie-downs, and bait residue than a flatwater fitness board used from a clean dock. Clean any tackle marks or blood spots before they dry into the deck texture.
Dry the Board Completely Before It Goes in the Bag
A board packed damp after a sunset launch may look clean the next morning but still transfer odor and grit into the bag, especially around the fin box, valve collar, and D-ring patches. Drying is a critical maintenance step, not a cosmetic afterthought. Trapped moisture causes mildew, corrosion on metal accessories, and grime transfer inside the storage bag.
Follow a practical drying sequence that exposes common water traps. Towel the deck pad first. Flip the board and wipe the hull. Stand it on one rail briefly to drain the edges, then check the valve collar, fin box, carry handles, D-rings, and bungee mounts.
In shade with light airflow, a towel-dried recreational iSUP often needs an additional 20-40 minutes before the deck pad and hardware pockets feel dry to the touch. If the board must be packed damp at a launch, unpack it at home or camp the same day and dry the bag interior as well as the board. Avoid using direct midday sun, a heater, a hair dryer, or a hot vehicle interior as a shortcut for drying.
Inspect Valves, Seams, Rails, Fins, and Attachment Points
How do you catch a mechanical failure before it happens on the water? Create a repeatable inspection route from nose to tail so you do not miss common wear points. The route starts with pressure-holding fabric and seams, then moves to mechanical parts that loosen or collect grit.
Begin at the nose seam, move down the left rail, check the tail seam, and return up the right rail. Inspect the deck pad edge, valve area, fin box, leash plug, carry handles, D-rings, bungee anchors, action mounts, and fishing accessories. On the seams and rails, look for lifting edges, bubbles, abrasion marks, soft spots, pinched folds, or any area that flexes differently from the surrounding PVC.
For the valve check, listen for hissing after inflation. Confirm the cap threads smoothly and clear any grit from the valve area before connecting the pump hose. Verify the fin screw or clip is present, the fin box is not packed with sand, and leash plug or D-ring stitching has not lifted. Recommended inflation varies by construction, board size, valve type, and drop-stitch design. Always pull pressure guidance directly from the board maker's printed range or manual.
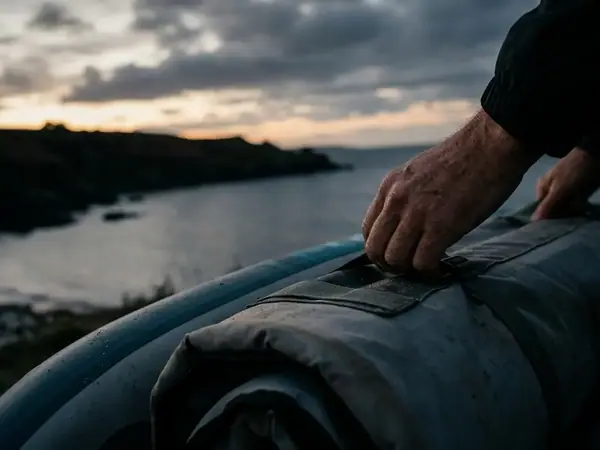
Store It Inflated, Loosely Rolled, or Packed for the Season
Storage choices dictate the type of stress placed on the board. Inflated storage reduces fold stress but creates space and pressure-management concerns. Rolled storage saves space but can create repeated crease lines if packed too tightly.
If storing inflated, use a wall rack, ceiling straps, or a padded shelf that supports the board without pressing into the rails. For partially inflated storage, leave enough shape that the board is not folded sharply. Do not store it fully pressurized in a hot shed, sunroom, car, or direct sun. When rolling the board, remove the fin, clear the fin box, dry the deck pad, keep hardware from pressing into the PVC, and avoid placing heavy objects on the bag.
The seasonal packing sequence requires preparation. Clean, rinse, dry, and inspect the board. Remove the fin, protect or loosen accessories as the manufacturer recommends, and roll according to valve placement. Store the pump hose, fin, leash, repair kit, and valve tool in a labeled pouch. Ideal storage conditions are cool, dry, shaded, off the ground, and away from sharp tools, fuel, solvents, rodents, and stacked gear.
Travel and Invasive Species Care
Pulling mud and plant fragments off the board is easiest while the hull is still wet and fully accessible. Put travel cleaning before loading the vehicle. Before moving between waterways, remove weeds, algae strands, and plant fragments from the deck, rails, fin box, leash, paddle, and bag.
Drain standing water from the deck pad channels, fin box area, cargo bungee zone, cooler mounts, and any accessory bases before packing. This sequence mirrors the National Park Service Clean, Drain, Dry guidance for reducing the spread of aquatic invasive species.
Dry the board and accessories before the next launch whenever conditions allow. This is particularly important on road trips, paddle-camping routes, SUP fishing tournaments, and rental use across multiple lakes or reservoirs.
Minor Repairs and When to Stop
When should you open the adhesive tube? Separate owner-level fixes from structural concerns before attempting a repair. Small punctures, loose valve fittings, fin hardware, and minor scuffs stay in the field-repair category.
The owner-level repair workflow is precise. Locate the leak, mark the area with removable tape or a pencil, and deflate the board. Clean the surface, dry it thoroughly, apply manufacturer-compatible patch material, follow the adhesive label instructions, and wait for the full cure window before reinflation. For valve issues, clean grit from the cap and valve seat first. Use the supplied valve wrench only if the manual allows tightening, and do not over-torque the valve body.
Do not use duct tape as a permanent patch. Avoid unrelated household adhesive, superglue, hot glue, open flame, or heat tools near PVC fabric. Escalate seam separation, large tears, repeated valve leaks, rail damage near high-stress areas, structural bubbles, warranty questions, and damage that changes how the board holds pressure to a professional.
Risk Factor: Applying household superglue or hot glue to a PVC paddleboard will ruin the surface and prevent proper marine adhesives from bonding during a professional repair.
Maintenance Calendar
Organize your maintenance calendar around real paddling moments rather than arbitrary dates. The highest-value checks happen after every outing, after dirty or salty sessions, before travel, during the active season, and before winter storage.
After every paddle, rinse the board, remove grit from the fin box, towel off standing water, and check that the valve cap is closed before transport. After saltwater or muddy sessions, wash with mild soap, brush the deck pad gently, clean around hardware, rinse thoroughly, and dry before bagging. Monthly during the active season, inspect seams, rails, valve behavior, fin hardware, the leash plug, handles, D-rings, bungees, and the repair kit contents.
Before travel, clean, drain, dry, and inspect the bag. Secure the fin and pump hose, and pack a towel or sponge for the next launch. Before seasonal storage, clean, dry, inspect, remove the fin, avoid sharp creases, protect accessories, and store away from heat, fuel, solvents, rodents, and heavy objects.
Recommendation: Keep a printed copy of your board's specific pressure limits and valve tightening procedures inside your dry storage bag alongside your repair kit.
Scope Limitations
Severe impact damage requires specialized evaluation that falls outside standard driveway maintenance. This guide covers recreational inflatable stand-up paddleboards used for beginner paddling, touring, travel, family use, and SUP fishing.
It does not replace the board maker's manual, warranty terms, pressure limits, adhesive instructions, valve procedures, or repair recommendations. Seam failure, suspected internal structural problems, and boards used for demanding whitewater or expedition travel need professional assessment.
This routine reduces common wear patterns, but it is written specifically for recreational iSUP ownership, not for commercial rental fleet maintenance or high-abuse expedition repair planning. These boundaries help you apply the right level of care without masking structural issues that require a manufacturer's intervention.