In this Article
Start With the Launch Brief, Not the Water
In my time as a Coast Guard Safety Officer, I saw that most recreational paddleboard incidents stem from decisions made before the board ever touches the water. Inflatable paddleboard safety is a pre-water routine. It is not a paddling skill performed after something goes wrong.
This checklist is a repeatable five- to ten-minute shore-side routine. It is built for recreational paddlers, travelers, anglers, and beginners launching into lakes, bays, harbors, and slow rivers. The goal is to catch preventable failures early.
We prioritize specific, correctable issues. An underinflated board, an unsecured fin, a missing or unworn personal flotation device (PFD), a forgotten leash, a weather mismatch, missing repair items, and overloaded gear are all problems you can fix on land. This guide focuses on ordinary recreational decision-making. It is not designed for swiftwater, surf rescue, night navigation, or expedition planning.
1. Confirm the Paddle Plan Before You Unroll the Board
Imagine arriving at a busy lake launch, immediately pumping up your board, and paddling out without checking the wind direction or parking rules. You might return to find your vehicle ticketed or realize the paddle back requires fighting a stiff headwind. Planning must happen before unpacking.
Identify your route, launch point, takeout point, expected return time, and a land contact before any gear comes out of the vehicle. A float plan matters even for short lake or bay paddles. It turns an informal outing into a plan someone can act on if wind, fatigue, or equipment failure changes the day.
A practical float plan requires only a single text message. Include your launch location, route direction, board color, paddler count, vehicle location, and expected return window. Use a specific check-in window rather than an open-ended promise. Tell your land contact exactly what to do if they have not heard from you 15 to 30 minutes after the planned return.
Recommendation: Check parking access, shoreline exit options, boat traffic zones, and local rules before committing to a launch spot. Always determine whether your return leg will force you to paddle into the wind.
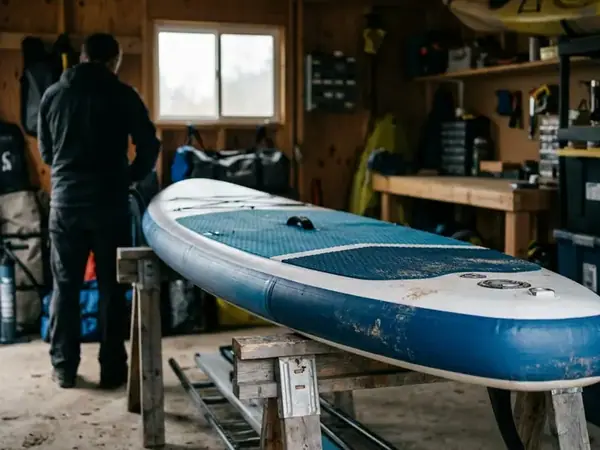
2. Inspect the Inflatable Board, Valve, Fin, and Deck Hardware
How do you spot a material failure before it compromises your balance on the water? You conduct a physical inspection while the board is still dry.
Kneel beside the board and run your hands along the rails. Inspect the seams, deck pad edges, D-rings, bungees, handle mounts, valve area, and fin box. Slow leaks, loose fins, and damaged attachment points are much easier to spot on shore. Once you are balancing in wind and glare, small defects become invisible.
Run your fingertips around high-stress seams near the rails, nose, tail, and handle mounts. Feel for lifting material, grit, or adhesive separation. Clear all sand from the fin box before sliding or tightening the fin. A fin box with sand in the track can make the fin feel seated while it is still partly engaged, which may show up as poor tracking after launch.
After inflation, listen near the valve for 10 to 15 seconds. Confirm the valve pin is in the closed position before seating the cap. Pack your fin and leash in the same outer pocket or mesh sleeve of your board bag so they are never separated from the rolled board during travel.
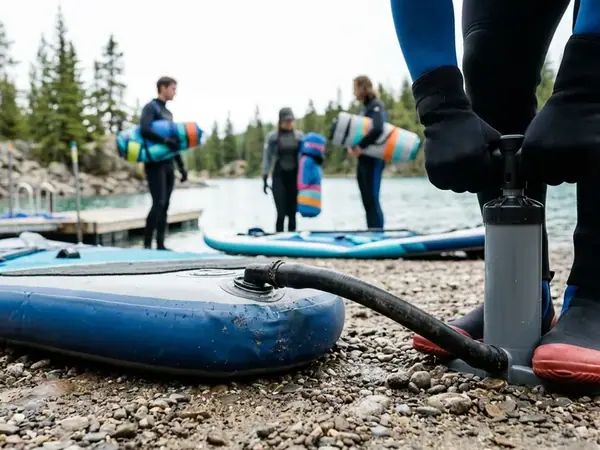
3. Inflate to the Board Maker’s Range and Rig the Leash Correctly
Paddlers must follow the pressure range printed on the board or stated in the manufacturer manual. Do not rely on a universal PSI target.
Correct inflation changes how the board rides. It affects stiffness, tracking, stability, and your ability to recover from chop. Recheck your pump gauge after the board has rested for three to five minutes while you organize other gear. This step matters if you inflated the board in direct sun or on cold ground, as temperature shifts alter internal pressure.
The rigging sequence should remove any guesswork. Inflate the board first. Confirm the valve is closed. A valve pin left in the open position after pumping can dump air during hose removal, creating a soft board before the paddler even reaches the water. Next, install the fin before carrying the board to the water so you can verify full seating, screw engagement, or clip closure on land.
Attach the leash to the intended D-ring, then attach the leash to your body before entering the water. Use ankle or calf leashes for typical flatwater paddling. Quick-release waist systems require specialized judgment and belong in moving water, current, snag zones, or entanglement-prone settings.
4. Put Safety Gear on Your Body, Not Just on the Deck
Consider a paddler who straps their life jacket under the front bungees, assuming they can grab it if they fall. If a wake knocks them off, the board can blow away faster than they can swim, taking the life jacket with it. Safety gear must stay with the paddler.
Wear your PFD before carrying the board to the water. Keep a whistle or other sound-signaling device attached to the PFD shoulder, zipper pull, or pocket where you can reach it with either hand. U.S. paddlers should review U.S. Coast Guard life jacket guidance and state requirements before the trip.
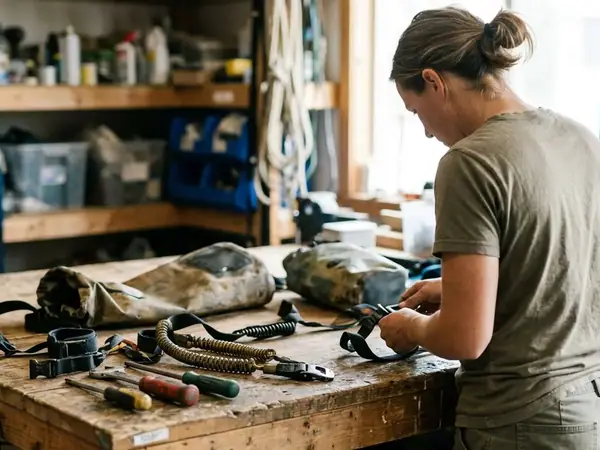
Carry your phone in a waterproof pouch attached directly to your body or PFD. A dry bag clipped only under the nose bungees can separate from the paddler during a fall, especially when wind pushes the board faster than the swimmer. For anglers and travelers paddling away from busy launches, carry a line cutter or knife, a compact first-aid kit, repair patches, and make sure you have pump access.
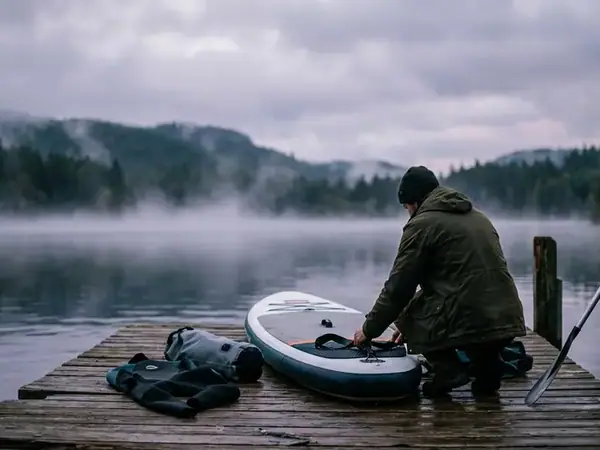
5. Read the Water, Wind, Weather, and Boat Traffic at the Shoreline
What does the water actually look like right now? A forecast may describe the region, but the shoreline reveals the launch—flags snapping inland, anchored boats pointing into the current, and floating debris tell the real story.
Watch the launch area for three to five minutes before committing. Ripples, cloud movement, current seams, and boat traffic patterns usually show more than a quick glance. Compare the most recent forecast with the actual conditions at the launch site before carrying your board into the water.
Apply the first-hundred-yards test. If the opening leg pushes you downwind away from the launch, decide whether the return trip will still be realistic when you are tired. Inflatable SUPs sit high on the water. Dry bags, coolers, fishing crates, and an upright paddler posture act as sails, making wind drift obvious.
Risk Factor: Never ignore local advisories. Rangers, harbor staff, outfitters, posted closures, and launch restrictions always take priority over a personal checklist.
6. Balance Cargo Before the Board Is Floating
Extra gear should never rescue a bad launch decision. Cargo loading comes after you assess the board, your body, and the conditions.
Place heavier items such as water bottles, tackle, small coolers, and dense dry bags low and close to the center carry handle. Do not stack them high on the nose. Keep one side of the board entirely clear for remounting. Fishing crates, rods, landing nets, anchors, and shoes must not block your chest and hips from sliding back onto the deck.
Run the leash path by hand from the attachment point to your standing position. Ensure it is not wrapped under a crate, anchor line, cooler handle, or bungee cord. Perform a quick shore shake test. Nudge the board from the side and lift the nose slightly. If the load shifts when the board is nudged on land, it will shift violently on wakes, chop, or during a kneeling start.
Beginners should leave nonessential accessories behind. Wait until you can kneel, stand, turn, fall, remount, and paddle back in mild conditions without relying on a deck load for balance.
7. The Final Launch Sequence
Standing at the water's edge, run through a final spoken check: Board, Body, Conditions, Decision. This sequence forces a deliberate choice rather than a passive drift into the water.
Check the board for proper pressure, a closed valve, a seated cap, a secure fin, an attached leash, and zero visible damage. Check your body for a worn PFD, a reachable whistle, a protected phone, suitable clothing for immersion risk, appropriate footwear, and accessible drinking water. Check the conditions by understanding wind direction, considering the return route, identifying exits, confirming acceptable weather, and observing boat traffic.
Finally, make your decision. Choose one of five outcomes before stepping in: launch, delay, shorten the route, change the launch location, or cancel.
Final Inflatable Paddleboard Launch Check| Phase | Check | Stop or change plan if... |
|---|---|---|
| Plan | Route, launch, exit points, expected return time, and land contact are clear. | You cannot explain the outing in one short text message. |
| Board | Seams, valve, fin box, and D-rings are inspected dry. | You find lifting PVC, a gritty fin track, or a loose valve. |
| Inflation and Leash | Pressure matches manual; valve closed; leash attached to board and body. | The board feels soft after resting, or the leash is missing. |
| Wearable Gear | PFD worn, whistle reachable, phone secured to body. | Your life jacket is strapped under the deck bungees. |
| Conditions | Wind, current, and boat traffic match your skill level. | The first 100 yards push you rapidly away from your exit. |
| Loading | Heavy gear is low and centered; one side is clear for remounting. | Cargo shifts during a shore shake test or blocks your hips. |
| Launch Decision | Board, Body, and Conditions support a safe return. | You feel pressured to launch despite missing gear or bad weather. |
Critical Insight: The safest checklist is not the one that gets the paddler on the water fastest. It is the one that makes cancellation feel like a valid, successful outcome.
8. Scope and Limits
This checklist supports ordinary recreational inflatable SUP launches from beaches, docks, ramps, and sheltered shorelines. It sets a baseline for conservative shore-side decisions.
It does not replace formal instruction, rescue training, local law, posted closures, manufacturer manuals, outfitter guidance, or professional assessment. Higher-risk environments demand specialized preparation. These include surf zones, whitewater, cold-water crossings, offshore routes, night paddling, strong tidal currents, remote expedition travel, and areas with known entrapment or strainer hazards.
While this checklist reduces common equipment and planning errors, it cannot account for sudden weather events or specialized environments requiring advanced rescue training. Postpone the paddle or seek local instruction when the route exceeds your equipment, fitness, self-rescue ability, or capacity to return against wind and current.